Playing the Odds
Drones are just like any other piece of gear; at times, they can and do fail. Similarly, pilots are just like any other crew; at times, they can and do fail. The key to drone safety is to play the odds in favor of safety at all times. With that in mind, these simple philosophies and steps can and will help you keep the odds in your favor so that when something goes not according to plan, you have the best chance at avoiding injuries or property damage.
P.E.G.: Your Key Checklist Acronym to Remember
P.E.G. stands for Pilot, Environment & Gear. Before connecting any batteries, you should get in the habit of saying the word “PEG” in your head. Some pilots actually have gotten in the habit of calling their batteries pegs — square peg in a square hole — as a memory tool. It sounds silly, but it’s a great memory tool to help you quickly go through your checklist before flying. And that’s really the most important part of drone safety: remembering your safety procedures.
Pilot: The “P” in P.E.G.
Owning a drone does not make you an aerial cinematographer any more than owning a camera makes you George Lucas. Think of it this way: Ever ask someone if they can edit something and they say “Sure — I’ve got Avid Media Composer.” Then, you get the finished edit and it’s absolutely horrible? There is no skill switch on the controller for a drone. It takes practice — lots of practice — to fly a drone safely and reliably in a professional setting. So how do you practice without endangering yourself, your gear, or other people? The answer is simple: simulators.
The Society of Aerial Cinematography suggests “neXt” simulator. In it you’ll find professional drones, and it flies very nicely. It’s also available for PC, Linux and Mac OS. You’ll still need to figure a controller in for your computer but if you’re tech savvy, neXt is a great simulator. The neXt simulator even allows for a second controller to handle camera operations, so you can practice as a team.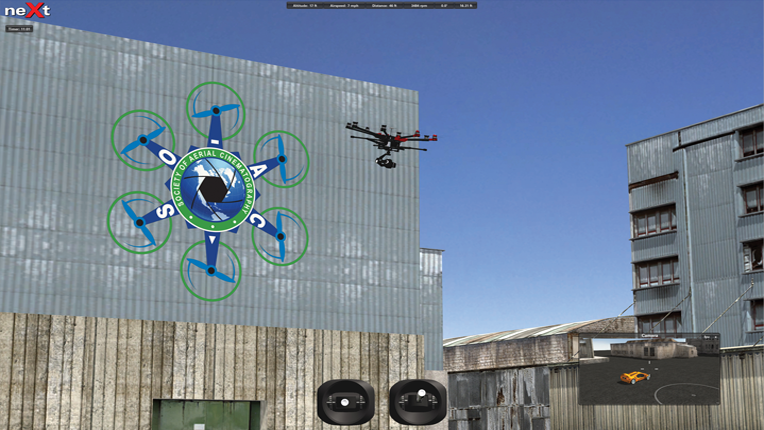
Real Flight is another great one with drones. It’s available at your local hobby shop and generally comes with a controller in the box. Real Flight is PC only. Plan on spending just under $200 on a simulator.
A simulator is essential gear for everyone from beginners to highly experienced professionals. Why? Because you should put in at least an hour of flight time every week. Sometimes flying your drone isn’t practical due to commitments, weather or even just wear and tear on your gear. You can fly your simulator at any time. For instance, I often fly while I’m rendering video.
While we’re on simulators, you should also fly in your simulator the night before your shoot — right before bed. It’s just like studying. If you practice right before bed, your brain is working on its drone-piloting skills while you sleep. The next morning your muscle memory will be better, and your skills will be the best they can be.
On shoot day, no matter your experience, you’ll be nervous for that first flight. Don’t exacerbate the situation with caffeine. Shaky hands mean shaky controls. You need to do everything you can to keep your heart rate down, calm, and get rid of the shakes. The day you don’t feel a bit nervous about flying your first flight, stop flying! You’ve lost your respect for the dangers of drone flight.
A tiny bit of fear and nervousness will help keep you alert, and your attention to detail high. Complacence is a drone pilot’s worst enemy.
We all know a shoot day is a whole lot of hurry up and wait. To keep your skills up and your shakes down, we suggest bringing a tiny drone to practice with off on the side while you wait. The absolute perfect drone for this is the Blade mQX. It’s small enough to fit in the smallest Pelican case, but flies very much like the bigger drones. Best of all, it’s super tough and cheap to replace.
Most important — don’t ever try a shot on set you’re not comfortable with. If you feel uncomfortable at all, tell the Director “no,” but always offer an alternative to achieve their vision. If in mid-shot you feel uncomfortable, don’t push a bad situation. Wave off, and try again if you feel up to it. If not, talk with the director about alternatives.
Environment: The “E” in P.E.G.
I swear, if I ever see another drone pilot lick their finger and hold it up to test wind I will not be held responsible for the tongue lashing about to ensue. You must show up to your shoot early to walk through the environment. A good drone pilot takes notes, draws maps, and does whatever they need to do in order to note obstacles such as power lines, trees with no leaves, buildings, outcroppings or anything else that they may not see on the monitor or from their piloting location.
An anemometer is a required gear item for a drone pilot. Not only do you need to know if there’s wind, but how strong the wind is and the gusts that are present. A beginner shouldn’t even consider flying in wind higher than 5mph +- 5mph gusts. As an advanced pilot, I’ve flown in 30mph winds, but I would never advise it. The shots you get just aren’t worth it — too floaty or even shaky due to the gimbal vibrating in the wind. Try to stay under 15mph +- 5mph gusts.
Wind isn’t the only factor. If it’s a hot day, allow extra time between flights for your motors to cool since hot motors fail much faster. Account for decreased battery efficiency on hot days. Rather than 12 minutes of safe flight time, drop it to ten. Dew points are important on colder days. Remember, electronics don’t like water. It goes without saying, but we’ll say it anyway: Don’t ever fly in the rain!
It goes without saying, but we’ll say it anyway: Don’t ever fly in the rain!
Check out the wildlife, too. Be aware of indigenous birds, animals and even insects. Large bugs can cause rotor blades to chip, so bring extra props if there are large bugs in the area, as well as lens-cleaning supplies.
I’ve been attacked by eagles, osprey, falcons, crows, pigeons and even a squirrel doing a suicide plunge at my drone to protect its nut-stash. You need to be aware of how to handle these situations to avoid collisions. For example, with a bird of prey, you’ll need to show submission by immediately dropping in altitude, but for a scavenger like a pigeon, you’ll need to climb rapidly to show aggressiveness.
Creatures like squirrels can easily be avoided by changing your vector in any direction as once they jump — they can’t change theirs. Hitting wildlife can not only be tragic and damaging to your drone; but it can cause legal issues as well. In California, hitting a Condor could result in prison time as it’s an endangered species, so be careful!
All of these things are the reason that having a spotter is key. You must educate your spotter on what to look for, when to tell you, and how to tell you. Some grip screaming “look out” isn’t much help at all. A spotter can even be more important than the pilot themselves. Drone pilots make the best spotters, but if that’s not practical, take the time to go over best practices with your spotter. They should be equipped with a radio, so you can send them closer to where you’re flying, and binoculars.
Come up with your own methodology. As an example, I have a spotter constantly talking in my ear with notes like “heading toward power lines: 30 meters away, and 1 meter down… 25 meters… 10 meters… start moving up… ok you’re good, you’ll clear it,” or “hawk nest 50 meters at your 2 o’clock… taking flight… drop drop drop.”
In one drone video posted to YouTube, you can actually see an eagle nest in the distance. If a spotter were present, they could have warned the pilot about this problem. Furthermore, the pilot realizes too late and tries to rise above — a sign of aggressiveness that galvanized a bird of prey’s instinct to attack. The result is not pretty for the drone and I can imagine the eagle didn’t fair too well either.
Gear: The “G” in P.E.G.
The night before a shoot, charge all your batteries. You should invest in some lipo bags, as well. These are bags meant to contain a fire in the event of a catastrophic failure during charging. Lipo batteries (Lithium Polymer) are volatile, and should be charged on a fire-resistant surface like concrete or stone inside of a lipo bag. Never charge swollen batteries. If a battery is swollen, dispose of it properly. We’ve actually known people who’ve burned down their house charging swollen lipos on wood workbenches in their garage. This video shows just how dangerous lipo batteries can be.
During your night-before check, manually spin each motor. They should spin easily, and consistently. No one motor should have more resistance than the others. A resistant motor could indicate burnt-out bearings or magnets that have slipped. This indicates a motor that is about to burn out. Replace any motors like this immediately, and do not fly until you have done so.
Any firmware upgrade needs to happen a minimum of a week before your shoot-day with a lot of test flights before shoot day. Never use firmware on a shoot you haven’t personally tested. Where firmware is concerned, if it’s not broke, don’t fix it. Also, before upgrading firmware, be sure to check with the community to see if anyone is having any issues. RCgroups.com or TheSOAC.com are great resources for finding out if people are having problems. In one real life example, a video shows what happened to one pilot who upgraded his firmware on an Inspire 1 and went out to shoot a real estate video. The drone took off as normal, but then almost immediately crashes into the garage, demonstrating why it is important to test any changes you make to your drone in a safe environment:
Let’s move into your preflight inspection. This inspection should also be performed the night before. But more important, before you put in a battery – and every time you put in a battery, even between each flight — follow these steps:
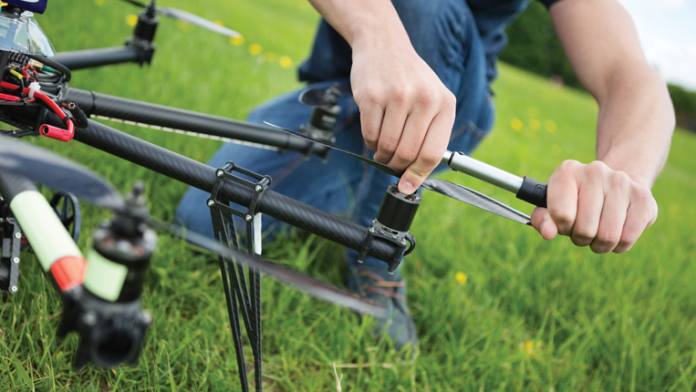
Check all spars and the center hub on your airframe for cracks and bends: Even though the footage you get may be smooth as silk, there are a lot of HFV (high frequency vibration) dampeners in place to give you that smooth footage. The actual airframe is under HUGE amounts of stress, and there is a ton of vibration. This can cause all kinds of problems over time, including cracking carbon fiber and bending aluminum. Firmly tug and put stress on each structural piece to see if it gives. This can indicate a stress fracture. Examine any metal parts for bends. If any problems are detected, immediately replace those parts or ground your aircraft.
Go through each screw and joint and check for loosening: We suggest putting a small mark on the side of each screw and a corresponding mark next to it. This can show you if any screws have backed out due to vibration during your flight. If replacing a missing or damaged screw, always use some Loctite or another threadlocking adhesive to keep the new screw in place.
Calibrate your compass between each flight: The compass on these aircraft is not a magnetized needle. It’s a crystalline structure that detects minor fluctuations in the Earth’s magnetosphere. It can automatically adjust for fluctuations due to factors like sun spots or solar flares while powered on, but what happens if you remove the battery, a solar flare occurs, and then you put in a new battery? The compass is no longer calibrated. This can cause issues from “toilet bowling” (where when trying to hover, the drone swirls in a circle) to “dog-running” (flying sideways), to more catastrophic incidents resulting in losing the drone or injuries on set. To be safe, calibrate every time you put in a battery.
Achieve GPS lock: The most common mistake we’ve seen in drone crashes is a pilot who slaps in a battery, and takes right off. You must wait for a GPS lock (gps on at least 6 or 7 satellite signals) before taking off in GPS mode. Not doing so can result in a sudden and catastrophic crash once lock is achieved while in the air. If flying in ATT mode (no gps), this isn’t necessary.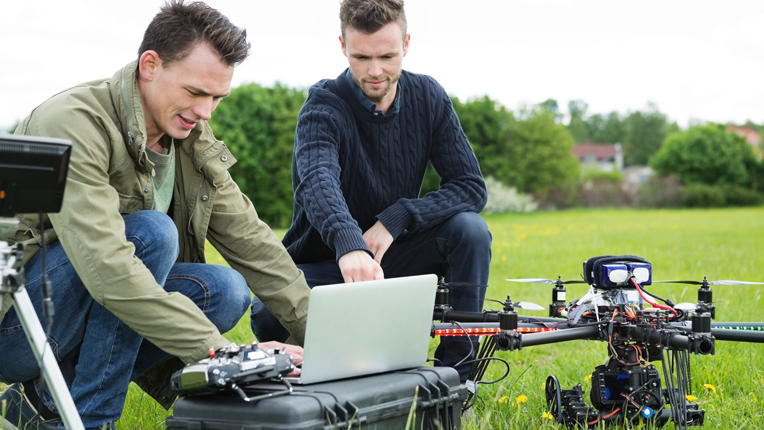
Stay calm. Stay methodical. Your attention to detail is not only necessary, but crucial for preflight inspections. No matter how much a hurry the director is in, a drone crash is much more devastating to a production than a few extra minutes between each flight to check your gear.
Additional Safety Procedures
A safety meeting with other crew and the cast is always a good idea before a day of shooting. Let them know some of the dangers without completely freaking them out, and give them a safe word. If they know to hit the deck when you say to, nobody will run into your drone by accident.
We recommend never flying an event shoot. First of all, nobody wants to hear what sounds like a swarm of angry bees at a wedding. Also, what happens if your drone fails over an unsuspecting crowd? Injuries and law-suits, that’s what. Here’s an example of what can happen.
Indoor flight?
Ok, first of all, this should never be attempted by a beginner. Flying indoors is an exercise in extreme precision, patience, attention to detail and mental stress. If you’re interested in learning to fly indoors, start by marking closed-quarters courses in a simulator, field, or forest. Never do an indoor flight on set until you’re extremely practiced and ready. Remember, an unprepared pilot destroying a house, injuring a person, or causing a shoot delay won’t stay in business long.
On that topic, why is it we see so many YouTube videos of newbies getting their first drone and trying it out in their living room the night it arrives? It never ends well. With all of that in mind, here are some things to keep in mind for indoor flight.
Blade guards do not make you invincible. They can often cause more problems than they solve. However, if you’re new to flying indoors, you may wish to invest in some blade guards to save your walls when practicing. They won’t save your pets, children, nor your marriage if you crash into your wife’s heirloom Victorian doll collection, but they can help with minor-grazes, and give you a very tiny chance to recover if you touch a wall. They do add weight, and reduce prop-efficiency though, so once you feel up to it, flying without them isn’t the worst idea. Never use them outdoors though. They alter your flight characteristics, and some pilots call them “wind socks” because breezes catch them.
Don’t ever use GPS mode indoors. GPS is a comparative sensor, meaning it’s constantly comparing your current location to your last-known. Even if you manage to get a GPS lock indoors, you’re likely to lose it at some point. Reacquiring your GPS lock can then send you flying into a wall. For example, if you are hovering in one location with GPS lock, the lose lock and move to another location on the other side of an obstacle and re-gain GPS lock. This sequence can send your drone back to the original location because it thinks it inexplicably moved and needs to go back. On a Phantom you need to plug in a computer and change your guidance system to “NAZA mode” to activate your “ATT mode” switch on your controller. ATT is “attitude only” mode.
With GPS mode off, you’ll encounter a whole new set of piloting issues. In GPS mode, you don’t truly fly the drone. You wrangle it. You tell it which direction to move, and it goes there. When you let go of the sticks, it stops. Not true in ATT mode. Once you start the drone moving, it keeps moving until you counter its vector with opposing thrust. In other words, if you’re moving forward, you must pull back on the stick to stop it. For this reason, you need to move very slowly indoors. For any movement, you’ll have to counter it just right or risk over-correcting and sending it speeding into the opposite direction. This is the essential reason a lot of practice is required to fly indoors.
One video shows what happens when a pilot flies indoors. One of those newbies we talked about above crashes into the fireplace, and gets a well-deserved tongue lashing of epic proportions from his wife.
Conclusion
Drones are amazing for production. They’re relatively inexpensive, cinematic quality cameras are now available for them and also relatively inexpensive and they can be found virtually everywhere. But with the ease of use and inexpensive price tag comes a systemic lack of respect for maintenance, dangers and skill needed to operate them. Remember, these things are flying Cuisinarts — actually, four or more of them depending on how many blades are spinning. Just look at what happened to Enrique Iglesias when he underestimated the dangers.
If you maintain your safety procedures, maintenance and best practices we’re not saying you’ll never have an incident, but you’re definitely minimizing your risk, and getting much better odds. Happy flying, and “may the odds be ever in your favor.”
Ty Audronis is a professional drone pilot, author of the currently highest rated book on building multicopters, and a member of the Society of Aerial Cinematography’s Advisory Committee. He’s flown for major networks, film and advertisements.

