
In most cases, multiple lights are used to create what is seen on screen or in a photograph. This can be an intensive and expensive process that takes time to setup correctly. Yet in many cases, such setups are not needed or are just not possible due to budget restrictions or lack of access to equipment.
Furthermore, for the inexperienced director or cinematographer, there’s a steep learning curve to mastering multiple light setups. In that case, the simplest and most efficient way to gain experience with an elaborate multiple light setup is to start with one light and grow from there.
…the simplest and most efficient way to gain experience with an elaborate multiple light setup is to start with one light and grow from there.
Below are listed five ways that one light can be experimented with to find the desired look for your production. For times when you’re limited to using one light, either by choice or necessity, these setups offer excellent starting points for creating simple one-light setups with professional results.
1. Place Subjects Strategically
The movement of the subject in regards to the distance from the lighting source, be it up, down, or profile will create varying looks that can yield professional results. Furthermore, throughout the lighting process, watch out for hot spots; the proximity or intensity of the lighting can cause areas on the subject where detail is blown out.
It’s also important to consider the direction of other ambient light sources in the area in which you are shooting. Place you subject so that the light that you add to the environment will produce the best effect, and take advantage of any potential fill or back lighting that could improve your shot.
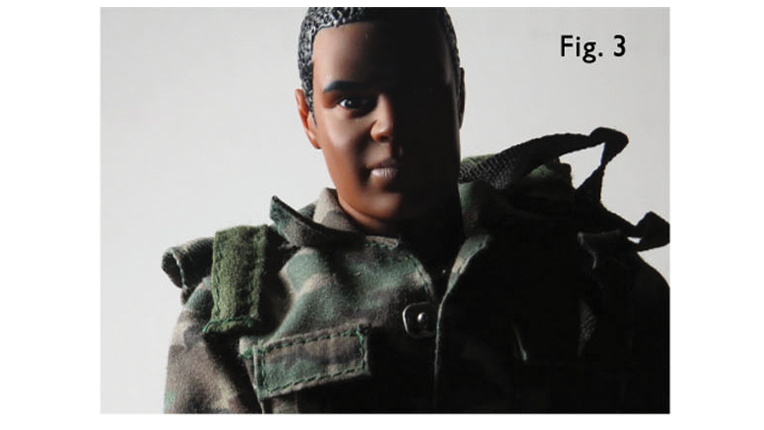
2. Try all 5 Light Angles
Try lighting the subject from the front (fig. 1), the back (fig. 2), the side (fig. 3), from above (fig.4), and from below (fig. 5). Each of these placements will yield a different look and create a different mood. If you’re looking for more of a straightforward portrait or a more evenly lit subject place the light at 45 degrees above the subject for even lighting across the face.


3. Play with Intensity and Quality
If you have control over the intensity of the light’s output, either though a dimmer that is built into the light or one that is external, try adjusting the output to be either more or less intense. If your light is not equipped with a dimmer, you can achieve almost the same effect by moving the light closer to or further away from the subject. Keep in mind, that increasing the distance between the subject and the background will cause the background to become darker.
Each different level will create a different effect, allowing you to make other adjustments that will affect the resulting image. For example, a high intensity light may call for you to use a high f-stop such as f/11, or f/16, allowing your camera to capture deeper depth of field. A low intensity may call for a low f-stop such as f/1.2, or f/1.4, creating shallow depth of field.
Another factor in the effect your single light has on an image is the light’s quality, either hard or soft. A hard light will create dense, well-defined shadows while a softer, more diffused light tends to wrap around a subject to create softer shadows. Use a soft-box or other diffusion material to soften a hard light source.
4. Create a Silhouette
Single light setups are particularly good for situations that require more dramatic lighting, since the shadows generally won’t be filled in by a second light. This can create a sense of foreboding and is great for more menacing characterizations. Using one light is also a great way to create silhouettes (fig. 6). For best results, bounce the light from the source toward the subject using a white board or a reflector, which brings us to our final point of consideration.
5. Use Reflectors
In a single light setup, the use of a reflector can help spread the one light around the subject, creating a fill light source designed to reduce shadows (fig. 7). This can give the image a bit more separation from the background and generally evens out the light. Other options for fill light could be windows letting in sunlight, bounce boards, white boards or a mirror.
Light it up
How you decide to light your subject will determine the tone and or mood denoted from the imagery created. For example, lighting your subject at 45 degrees above the subject creates a light that is evenly distributed and feels like light from the sun, whereas lighting from below or at a low angle — or even cast in silhouette — feels dangerous and foreboding. Using reflectors and white boards will help create dimension and separation while filling in unwanted shadows, making your production feel more complete. Now, no matter what situations may occur on set as video producer or gaffer, there is hope in making your set up look professional, even if you find yourself down to one working light. Go forth and create.
Marc Johnson is a University of Chico graduate, a lover of the creative arts, avid photographer, with an undying entrepreneurial spirit.


