
There is a technique from the world of motion pictures that has become more popular with smaller productions lately. It’s called Dual System Sound and it has the potential to take your projects to the next level, if you’re willing and able to deal with the added expense and hassle. The upside is that dual system sound is more affordable and accessible today than ever before, making it available to everyone from mid-sized production houses to the home video editors working from their bedrooms. You’ll need a few extra tools – which you may already own – and another pair of hands to keep it all under control, but this is definitely worth looking into.
Dual What?
Simply stated, dual system sound is the practice of recording production audio on two devices – usually the camera and an external recorder – for post-production manipulation. Why go to that much trouble? There are several reasons. Camcorder microphone inputs have variable quality and headroom that may limit the audio quality. Additionally, some people are not thrilled with the audio in MPEG video formats. By recording on another device, this eliminates the potential problems associated with the camcorder and ensures a solid recording. Another popular application is multichannel audio. Very few cameras record more than two channels. This is fine for simple productions, but in reality television and any other programming that requires multiple microphones, dual system sound allows as many microphone channels as necessary.
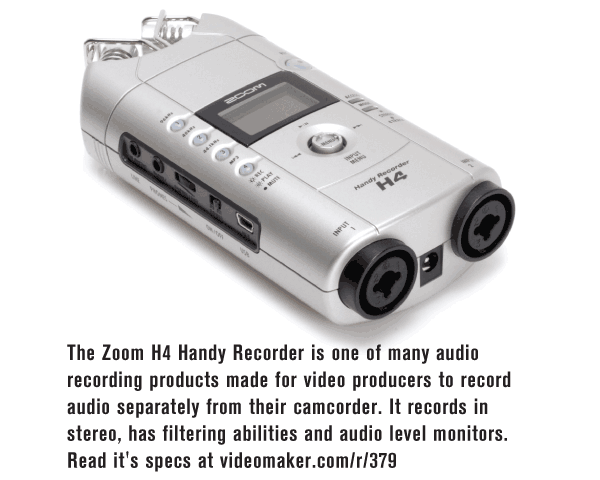
Gearing up for dual system sound is easier today than ever before. The new crop of portable flash-based audio recorders makes remote audio simple. Available from manufacturers like Sony, Tascam, Samson and Zoom, most of these compact recorders use off-the-shelf batteries and memory cards to do their job. While many are two-channel recorders, some offer four-channel recording that expands your options. Alternatively, you can use a laptop or even a netbook for audio recording. The advantage here is the ability to choose an audio interface that suits your specific needs. External audio interfaces attach via USB or Firewire and are available in everything from two to eight channels at very affordable prices. Channel counts of 16, 24 or even more are possible if your wallet is deep enough. Alesis, Edirol, M-Audio and Presonus are just a few of the manufacturers making excellent external audio interfaces today. Along with your recording equipment, you’ll need a good pair of headphones for monitoring and a way to feed the audio output of your recording device to the camera. This is often a simple Y-adapter and patch cable. It’s also wise to enlist another operator for audio-specific duties. Test your gear ahead of time to ensure proper operation and compatibility with your video editing software.
Home Video Editing Tips For Getting Dual System Sound
The power and flexibility of dual system sound is great, but there’s one problem remaining: how do you sync the audio and video? The Hollywood answer is timecode. Timecode readers, writers and generators are expensive boxes that have many capabilities, but require a fair amount of care and feeding. Fortunately, there are simpler, more cost-effective options. The most common sync method is a simple hand clap. Just before the scene starts have the talent or an assistant clap their hands in clear view of the camera. Back in the edit suite, you can scrub the video timeline to the exact frame of the handclap and slide the audio track in to match. Of course, if you have a little budgetary flexibility, consider purchasing a clapper board. Also known as a clapper or slate board, these boards have hinged sticks that click together with a satisfying smack – perfect for audible and visual sync purposes. For around $40 you get easy sync, scene and take information along with that professional look.
On the set, it’s wise to have one person assigned to audio duties. In addition to mixing multiple microphones and sound sources, your audio person must keep a log of all the audio and video takes, matching camera information to specific recording times and/or file names. If they’re good with computers, a laptop and spreadsheet are perfect for the job. Otherwise, a simple legal pad gets the job done on a budget and doesn’t require additional power. This is tedious work but absolutely necessary when you start editing. Without a log, you’ll spend countless hours finding audio clips that match specific video takes.
Slip and Slide

Back in the edit suite, the extra work you did in the field starts to pay off. By splitting the sound and feeding duplicate copies to the camera and audio recorder you have something to listen to during logging or rough editing. Once you’ve identified the video clips you want to use, refer to the log and import the matching audio track. Start by finding the exact video frame where the clap takes place. Hand claps tend to bounce a bit, so aim for the moment of impact. Once cued, look at the audio waveform and you’ll notice there is an audio spike during the clap. Drag your matching audio clip onto an empty audio track and find the clap spike. All you have to do is slide the new audio clip on the timeline and line up the spikes. Mute the original audio, link the new audio track to its video clip and you’re ready to move on to the next clip.
About now, you’re thinking that seems like a lot of extra work, and you’re right. However, this is how most major motion pictures and TV dramas are created. The benefits to the video producer in syncing dual system sound are many. First, by separating the audio recording from the video, you gain a potential increase in sound quality. This happens simply because dedicated audio recording equipment has better specifications and headroom than a typical camcorder. Second, dedicated audio personnel monitor all the sources, catching bad mics, signal overload and other audio problems. Finally, you’re not limited to the standard two-channel audio recording. Four, eight or even 16 channels are possible in the field. Each channel can be assigned to an individual character’s microphone and you can even record simultaneous surround sound if you’d like.
The Payoff
The extra time and effort used to shoot with dual system sound says you’re serious about the audio quality of your production. And, of course, there are obvious signal processing benefits to having each microphone on a separate track. But it also opens up new possibilities. Imagine shooting a live music performance with multiple cameras and recording the audio on additional equipment. Switch between cameras in post and mix the audio just like an album, syncing only after you’ve polished the final product. With some experience, you’ll have a powerful new production tool that could create new opportunities.
Sidebar
Or Not…
While dual system sound is called for on larger productions where a high degree of quality and control are needed, it may be overkill for a simple interview shoot. It’s really a matter of matching the technique to the job. So, if your camera has clean audio inputs and you’re using good microphones, that may be perfectly adequate for your production. However, if that isn’t the case, or your camera doesn’t have an audio input, dual system sound can be a lifesaver.
Contributing Editor Hal Robertson is a digital media
producer and technology consultant.


