
Blackmagic DaVinci Resolve’s trim tool is a useful tool that will streamline your editing workflow. However, it operates differently than many other editing apps. If you are used to Premiere Pro and make the transition to DaVinci Resolve, it will take some time to adjust to the tools and interface. But don’t fear, we’ll cover all you need to know about the app’s trim tools and how to use them.
There are plenty of great tools in DaVinci Resolve that makes the entire editing process much easier. You have the tools to make ripple, slide, slip and roll edits. However, before we get into those tools, we have to talk about the Trim Mode in DaVinci Resolve.
DaVinci Resolve’s Trim Mode
To perform ripple, slide, slip and roll edits, you first must enter DaVinci Resolve’s Trim Edit Mode. In Resolve, the Trim Mode is a dynamic process. Essentially that means that when you are working in the Trim Edit Mode, you can perform different edits depending where you place your cursor. It makes the entire editing process much faster and more efficient. Additionally, this mode allows you to edit without having to memorize multiple keyboard shortcuts or know where a particular tool is in the interface. You can access the Trim Edit Mode by pressing T on the keyboard. That’s the only shortcut you need. You have to be in the Trim Edit Mode to do any of these trims.
Dynamic trimming edit tools in DaVinci Resolve
Slip edit
The Slip edit keeps the current clip length the same. However, it changes its content depending on how long the clip is. So say you want a scene to be 10 seconds long, for instance. You can use a 20-second clip and cut out a 10-second section. You can then slide around the 20-second clip in the 10-second window. This tool comes in handy when editing to a score and need to edit to the beats of the song.
To perform a Slip edit, you only need to hover the cursor above the thumbnail preview of the clip and drag left or right.
Slide edit
Like DaVinci Resolve’s Slip edit, the Slide edit keeps the current clip duration. However, it shortens or lengths the clips that are around it. To perform a Slide edit, place your cursor underneath the thumbnails of the title of the media clip. Once you are able to perform the edit, you can slide the position of the clip along the track. The clips before and after the clip you are sliding will increase and decrease their positions as well.
Ripple edit
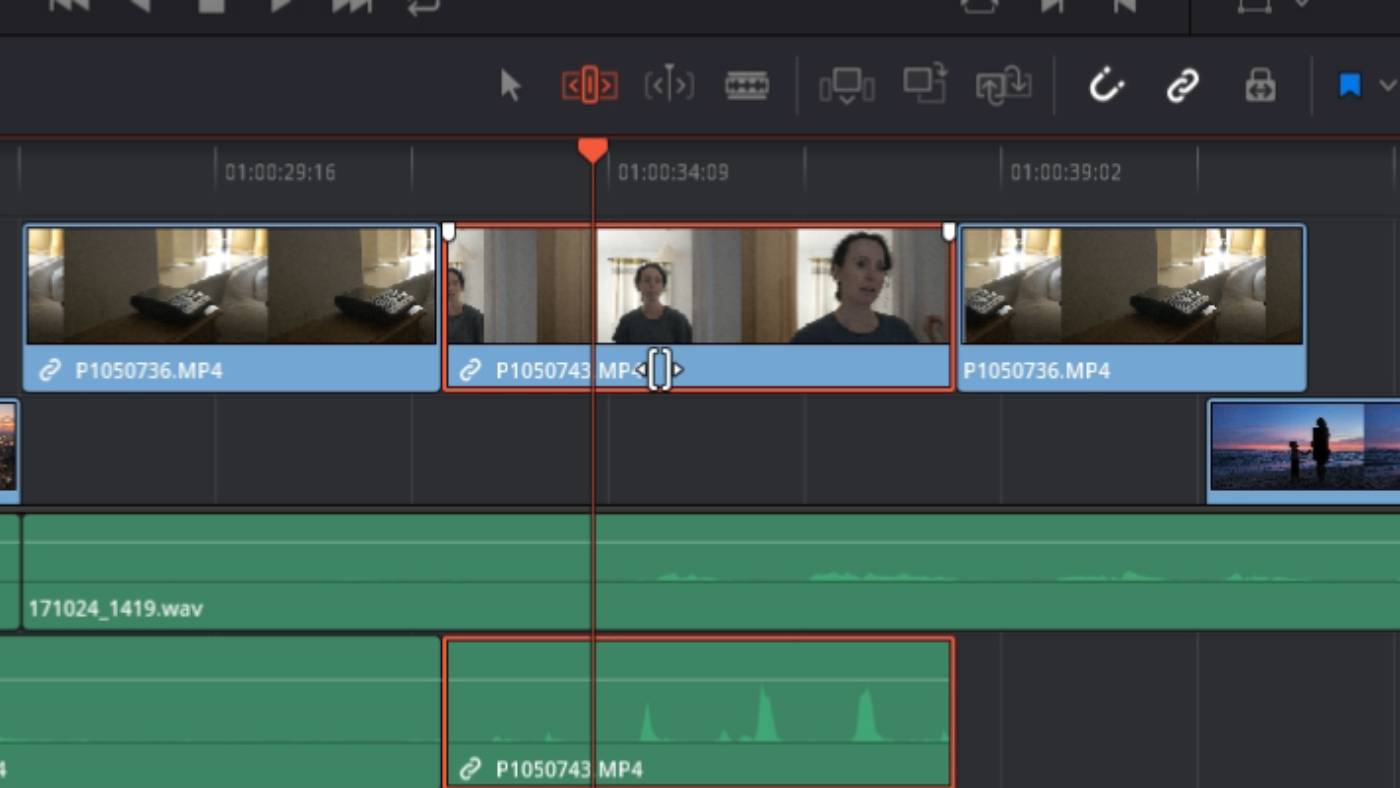
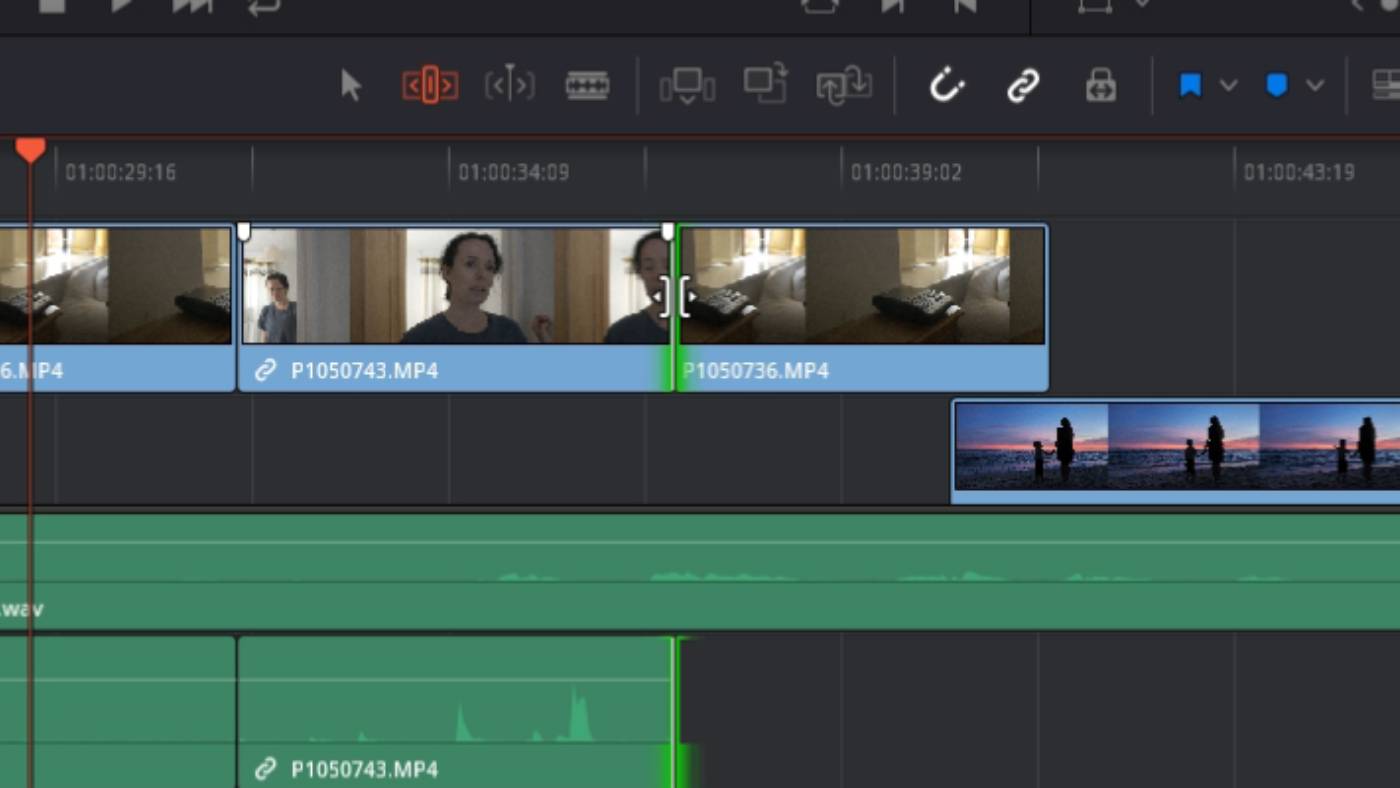
This edit helps when you are editing many clips together. The Ripple edit resizes the clip at its edge while pushing and pulling the adjacent clips. You can perform the Ripple edit by placing your cursor slightly in from the edge of the clip. You will then see your cursor change into the Ripple edit icon. Then you can perform the edit.
This DaVinci Resolve edit tool allows you to increase and decrease the length of the clip. Additionally, all other media clips on the timeline will move either forward or backward with the clip. If the edge of the clip is highlighted green, that means you still have unused footage for the selected clip. If the edge is red, that means there is no more footage left for you to use.
Roll edit
Roll edit is one of the simpler Trim trim edits you can use. Basically, you place your cursor between two clips and they both resize one where you drag the border between the two clips. Put your cursor directly within an edit point. That’s where one clip connects to another. Your cursor should change into the Roll edit icon.
When performing the Roll edit, you will increase or decrease the length of a clip. At the same time, the clips before and after the clip with increase and decrease as well.
These are the trim tools DaVinci Resolve has to offer and how you can use them. While they might take some time getting used to, they are huge time savers. Be sure to practice them at every chance you get. You will find your workflow will become much easier and faster as you get used to the trim tools.
Image courtesy: Blackmagic Design


